Creating a Single-Page Newsletter
The Creative Asset Wizard can help you make more complicated documents with different a varieties variety of text formatting options and graphical elements. A good example of this is our Single-Page Newsletter template.
Starting a Newsletter
Start by selecting “Newsletters” from the “Create a Document” page. You will be taken to a page that displays all newsletter templates. Select the “Single-Page Two-Column Newsletter” template.
To begin editing the template, click the “Create Document Now” button.
You will be prompted to fill out the “Document Name” field. Click the “Update” button located just below the Document Name field. Now you are ready to customize the sections of your newsletter.
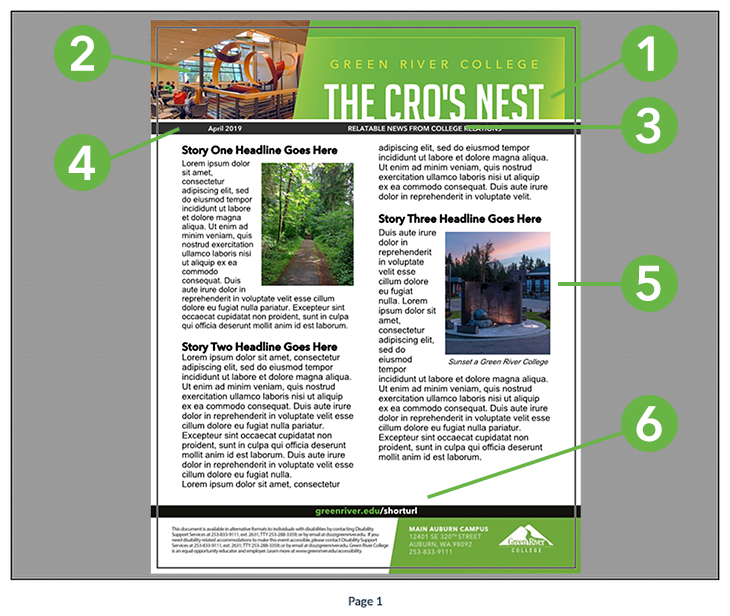
This template has six customizable sections listed below. To edit a section, simply hover over the area you would like to edit and click on it.
- Newsletter Title
- Top Corner Image
- Subhead
- Edition Number and Date
- Newsletter body smart regions
- Short URL
Tip: Notice how your cursor changes from an arrow to a pointing finger when you hover over anything editable. This is true across all document types and indicates the field is ready to edit.
After editing a section, be sure to click the “Save Changes” button.
Editing Header and Footer Text Regions
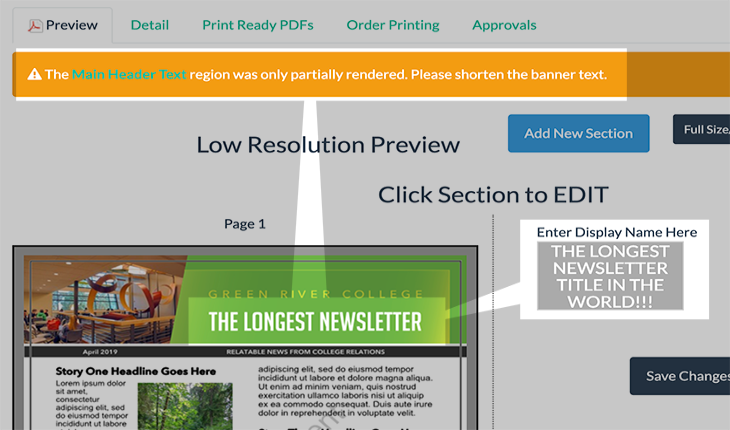
The newsletter title, subhead, edition number and date, and the short URL are all editable text fields. They can be customized by hovering your cursor over the section and clicking directly on the low resolution preview of the newsletter. Enter your text into the appropriate fields the click the “Save Changes” button.
Unlike business cards, these text regions don't have fixed character limits. Some will dynamically change the font size to accommodate more text, some will not. In both cases, if you create text that is too long for the area, a warning banner will appear above the section instructing you to make changes.
Customizing the Header Image
To customize the Top Corner Image region, simply click directly on the image. This will take you to a new page where you can select a different image.

To select a new image from your computer, click on the “Add Image from this Device” located below the image preview.
From here you can either drag and drop an image file into the grey box or click anywhere within the box to bring up a file navigation window where you can select an image directly from your computer.
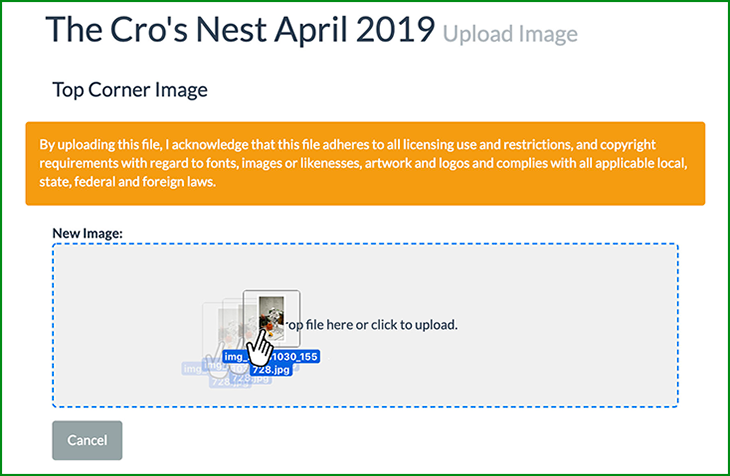
Image selection policies
Many templates in the Creative Asset Wizard will allow you use your own images. There are some limitations to this that are both technical and policy-based:
- Technical Specifications: Most templates will have minimum image resolution requirements. If you upload an image that is too small for print production, it will be rejected by the system. Some images might be large enough to fulfill this basic requirement, but may still not be good enough for a quality final product. In these cases, you might get a warning from the system.
- Policy Information: Per GA-27 Copyright Infringement Policy, all GRC faculty, staff and students must comply with all laws governing the use of copyrighted materials. This includes both the protection of copyright holders' rights, and also the full exercise in good faith of fair use and teaching exemptions as identified in Sections 107 and 110 of US Code, Title 17. Photo & Video Release for all photographs of students or other visitors to the Green River College campus are required for marketing purposes, with hard copies submitted to College Relations for archiving. If using your own work, or that of a student, please provide a completed Media Rights Release. Users should refrain from using stock photography and instead use of the official GRC Photo Library. Photos included in the library are curated by College Relations to ensure that photo releases and usage rights are never an issue.
Tip: A great source for images to use is our Green River College Photo Library.
Once you upload an image, you will be taken to an image cropping page. You will be asked to crop the image to fit the shape of the image region. This step insures your image will fit properly.
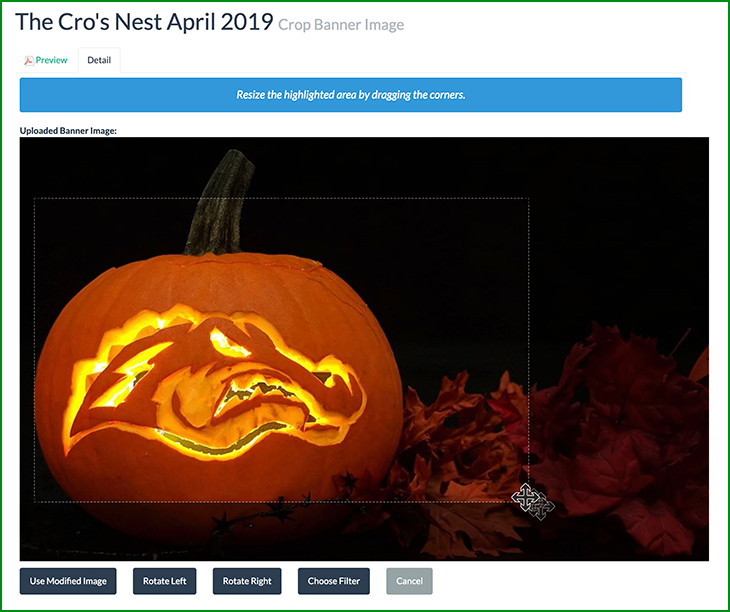
Once you are finished, click the “Use Modified Image” button below the preview.
Tip: You can also rotate the image and choose an effects filter on some image regions.
Customizing the Newsletter Content
The Newsletter body area of this template is divided into three “sections”. These sections are where you can put individual stories into your newsletter. Each section can be selected individually by clicking directly on the section on the Low Resolution Preview.
To customize a section, click on it in the Low-Resolution Preview. This will take you to a section editing page that is organized in two major parts:
- Image selection: from here you can remove, modify and add new images to the section.
- Section Text Editor
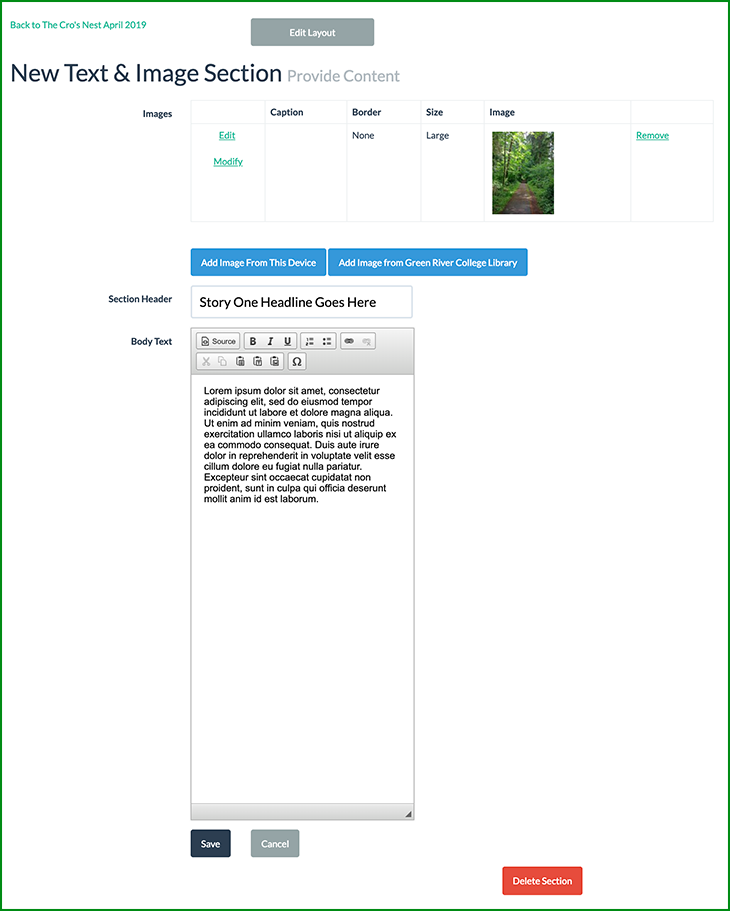
The images area has four basic controls:
- Edit: this allows you to enter a caption under the image, select a border and choose from three image layout sizes.
- Modify: this lets you crop, rotate or apply a filter to an image
- Remove: removes an image
- “Add Image from This Device” button: Allows you to add an image.
Tip: Sections have no fixed limit to the amount of text and images you can add. However, if you exceed the amount that can fit into a provided region, some of it won't appear. A warning banner will appear above the section instructing you to make changes.
The text editing area has two major features:
- Section Header: Enter your story headline here. Text that exceeds a single line will continue on an additional line.
- Body Text: Enter the main body of a story here. Unlike business card text entry, this smart region provides some word processing controls to format your text.
Tip: For users that understand basic html, the body text editor comes with a “source” button. Clicking this allows you to edit some basic formatting tags. If you accidentally edit in this mode and don't know how to fix any tags you may have changed, you can simply click the source button again. The Creative Asset Wizard does a pretty good job of repairing broken tags.
To delete a section, click the “Delete Section” button at the bottom of that section's Section Editing page.
Once you are finished editing a section, click the “Save” button located near the bottom of the page. This will return you to the Design Page.
Add New Section
If you have room, you can add another story/section, simply click on the “Add New Section” button at the top of the page.
This will take you to a section setup page. From here there are two items to complete:
- The Section Name: this is for organizational purposes only. It's not the story header
- Region Group: for this template, select “Newsletter Body Group”
This template has only one Input Type, so you can ignore that item.
Click the blue “Next»” button to go to your new section's Editing Page. Customize your section as you did with the previous ones.

Order Prints
Learn how to submit a print order using your finalized document.